

Water Damage Series – Part 6: Diagnostic Tools
Every job has its tools. Whether it is a roofer, computer programmer, or water mitigation company, everyone uses tools. Some of those tools fall into the more traditional definition like wrenches, hammers, and crowbars. But some are less tangible like training, information gathering, and math.
In restorative drying we use construction tools, electronic tools, and intellectual tools.
In this post we’ll talk about the electronic tools used for diagnostics.
The intellectual tools of training, information gathering, and math are all part of what your professional mitigation company brings. It’s decades of learning and you’ll be the beneficiary of that.
Diagnostic Tools
Everything these days seems to have gone high-tech, and restorative drying is no exception. I love it because it usually makes things better.
In restorative drying our first objective is to determine what is wet, and then how wet it is. It may seem like it should be obvious just looking around, but not so. Water has a way of traveling along walls, floors, and anything it touches. Unless it’s plastic or glass, given enough time, the water will damage it. It will soak up the water or corrode the material. And not all plastics are immune.
Some things are damaged more quickly than others. That means that time is of the essence when it comes to water damage. The faster you can identify how bad the water disaster is, the faster you arrest the problem and start the recovery.
These high tech tools will accelerate this information gathering phase of water mitigation. Diagnostic tools you might see a water technician use include:
- Moisture meter (along with many different attachments used to gather information)
- An infrared camera (which might also be referred to as a thermographic camera or imager)
- Video borescope camera (the construction version of an endoscope)
Moisture Meter
Moisture meters are a pretty large topic all by themselves. We won’t discuss how they work or even all of their features. We’re going to hit the highlights.
Like the name implies, this tool is used to measure moisture. I’ve broken out these tools into different types. These are my own categorizations for purposes of discussion only.
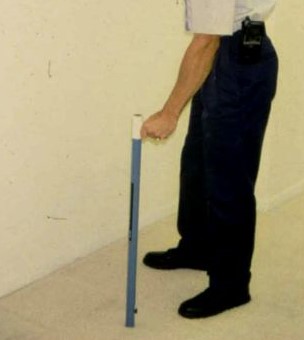
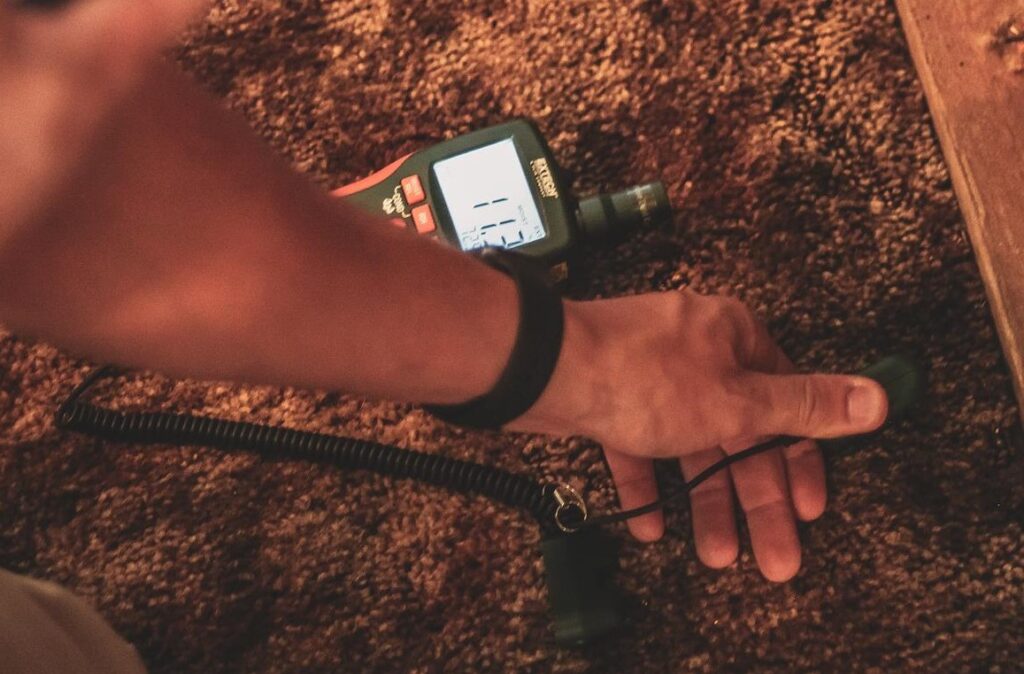
Hydro Sensors – some hydro sensors do only one thing, emit a sound to indicate moisture. That alone is a significant improvement over a visual inspection. You may see a tech using a probe to find out how far the water has traveled under your carpet. This helps them understand how wide-spread the problem is.

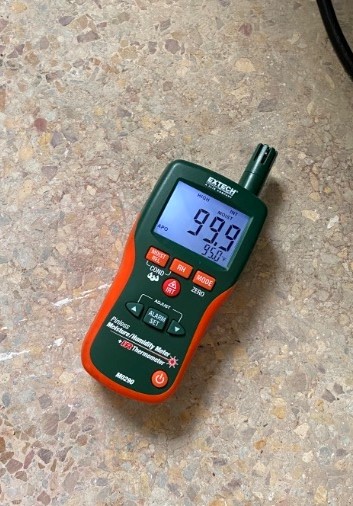
Thermo-hygrometers – These cool looking meters (if you like gadgets) have a display on it that will give readings to indicate how much moisture is present. They are an important tool because they provide information about the environment where your water loss happened. Information like humidity, temperature, and the dew point.
In the earlier post about Relative Humidity we addressed how these three measurements relate to each other and that post was followed by another that talked about how atmospheric conditions are used as the primary tool for drying your structure. So, when we say: ‘what is wet?’ and ‘how wet is it?’ we aren’t just talking about building materials and personal belongings. We’re talking about the air in the room too.
Non-penetrating – Like the hygrometer, this meter has a display as well. It will tell you how wet something is. As the name says, it doesn’t penetrate the surface. It is non-destructive. They can sometimes tell the technician how wet something is just below the surface. Sometimes you can see that the wood is wet. You can feel that it is wet. But without a meter, you would have a hard time determining progress.
These meters can be used to compare moisture levels between the wet areas that were affected by the disaster, and those areas that didn’t get wet. It helps the technician zero in on what the drying goal should be for that material at that location.
Penetrating – These meters get some of the most important information needed. They will measure moisture penetration inside your building materials. Yes. That means they will create a hole in the surface of whatever you’re measuring.
Suppose your carpet was completely soaked. The technician came and extracted the standing water and removed the carpet along with the carpet pad. Now he is looking at your subfloor and sees that it is wet. Of course it is. But how wet is it? You may know exactly how long that water was there soaking into the floor. But maybe you don’t.
Maybe a pipe burst while you were away, and you don’t know if it has been a few hours or a few days. Your tech needs to know how much moisture has been absorbed by that subfloor, and the way he can find out is using a penetrating meter.
These meters can be used on floors, walls, or anything that is wet where the tech needs to determine how much was absorbed without removing it.
Remember, the objective in calling in the technician is to stop water damage and prevent further loss.
It might seem extreme to punch holes in your walls so you can figure out how many air movers and dehumidifiers to use. But in so doing, the technician is trying to save the wall.
If the wall can be dried and therefore saved, it will be. But if the walls are wet beneath the surface and the proper drying system isn’t put in place, the wall will end up damaged and need to be removed and replaced. That causes additional cost in both money and time to full recovery from the loss.
The Right Meter for the Job
As is the case with all tools, you need to use the right meter for the job. These meters each serve their specific purpose, but they also have a variety of attachments that allow them to fulfill that specific purpose. This includes different probes. Some that are for penetrating at different depths, some that have insulation along them so that only the tips get the measurement, and so forth.
Additionally, not all materials are equal either. You wouldn’t want to rely on a moisture meter designed for wood when evaluating a concrete floor, and the hydro sensor might tell you that the subfloor is wet, but that isn’t enough information for determining how wet it is. This is when your technician will need to bring out the penetrating moisture meter.
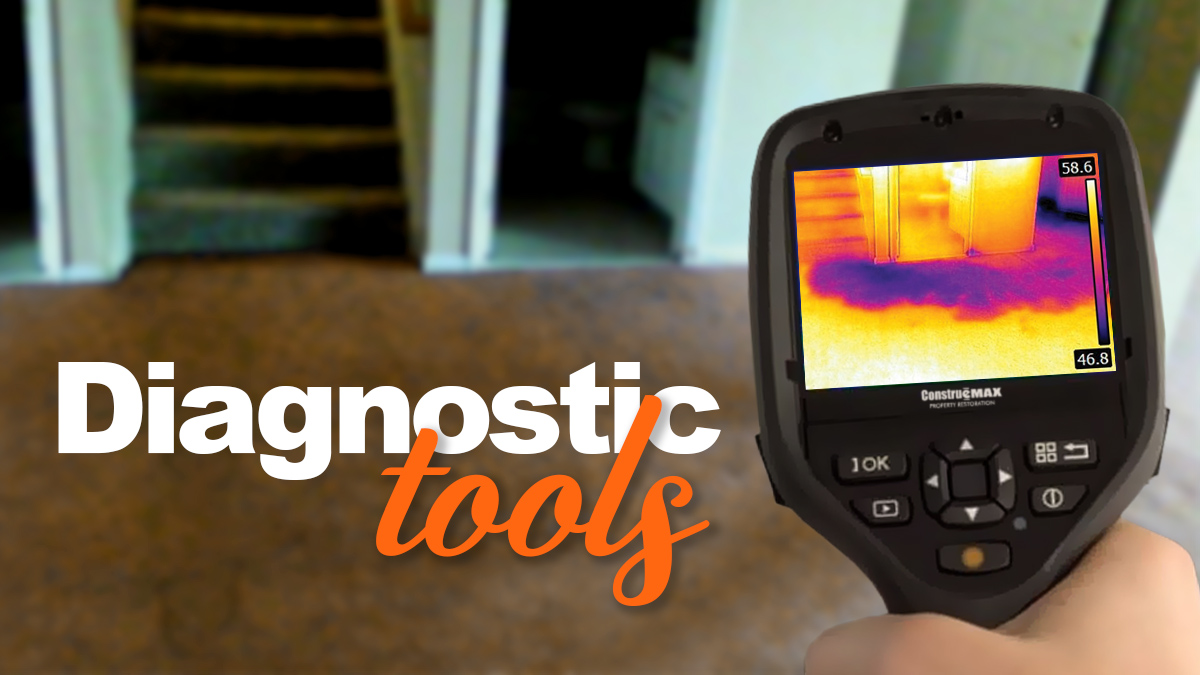
Infrared Camera (aka Thermal Imaging)
As someone who loves gadgets, you might look at infrared cameras and think ‘that’s cool’. And it is. It seems really high-tech and is reminiscent of all your favorite spy shows. But after the novelty of it wears off you come to realize that it is a tool that serves a specific function. There may not be any international intrigue here, but if you want, you can think of your water tech as a super-spy hunting a villain in your home. In this case, the villain is water.
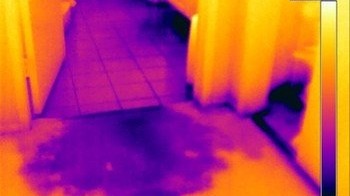
The infrared camera will show the technician temperature variations of whatever it is pointed at. The wet and dry surface of something may feel the same temperature to the touch, but the infrared camera will be able to detect those differences. Those differences can let the technician know where the water is and where it has traveled. This is especially helpful when the water is traveling on the inside walls or under the carpet.
More importantly, when looking for the source of a water leak, a thermal imaging camera will allow you to see these temperature differences over a wide area a lot faster than using a moisture meter on every surface.
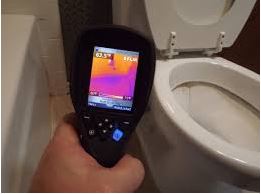
When you suspect water is pooling behind a wall, what is the best way to confirm it? The best way would be to remove the wall, look with a flashlight, and if no standing water is observed, place a moisture meter in the cavity. But wouldn’t it be a little less intrusive to use technology to give you insight? It is certainly helpful for detecting leaks in high ceilings, or in areas that might be less sanitary like behind a toilet or in a category 3 loss.
Using thermal imaging is great for giving an overall picture, but it is only one of the tools. Your technician will verify his findings with other tools as well like verifying them with his trusty moisture meters and their helpful attachments.
Video Borescope
Still in the ‘spy tech’ domain, a technician might use a video borescope. The borescope has a camera and light on the end of a flexible tube that you can use to view tight spaces that you just can’t get into. This could be useful for getting behind cabinets, into walls, ceilings, air ducts, or any space that is small or just out of reach.
This tool, if used at all, is useful for verifying information gathered using the other tools where the tech is not certain. It’s useful for confirmation. The water tech might need to remove a wall because of water damage inside, but if there is a question, taking a few minutes with a borescope can be very helpful to confirm the decision.
Removing a wall unnecessarily increases costs in time and money. Sure, better ‘safe than sorry’, but better information from diagnostic tools can reduce the need for ‘sorry’.
In Summary
Your technician needs to know what is wet and how wet it is. These diagnostic tools are helpful in doing just that.
In the old days (and this isn’t too many years ago) the way you had to find leaks and see where the water traveled after a leak required destructive measures. They would punch holes in walls and rip up carpet. It was a bit of trial and error. With these tools, the sizes of the holes are much smaller, the removal of carpet reduced, and the techs have more trial and less error.